Initial Setup Guide
Follow the instructions to setup Antero after the installation process.
1.After the program has been installed, the user will be presented with the Server Select window upon attempting to open the program.
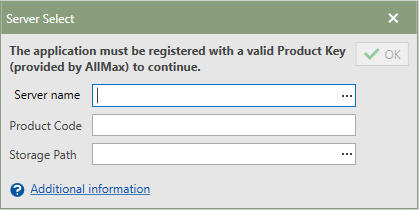
2.To start, click the ellipses (…) on the right side of the Server name field.
Note: The name of the server where an instance of Microsoft SQL Server is running can also be typed in the server field if it is known.
3.A fly-out window will appear on top of the Server Select window listing all of the computers and servers on the network. Choose the correct server where an instance of Microsoft SQL Server is running and where the Antero database will be hosted.
4.Click the  button in the upper right-hand corner of the fly-out window.
5.Next, Enter the ten-digit product code from AllMax Software in the Product Code field.
6.Then, click the ellipses button (...) on the right side of the Storage Path field to navigate to where the database's files will be stored.
Note: The storage path is used for document and image storage in Antero. If this is a multi-user installation, the path selected must be a network share accessible to all users of the software. Refer to the Storage Path help topic to learn more details about the storage path directory.
7.Lastly, click the [OK] button in the upper right-hand corner of the Server Select window.
8.The Server Select window will close and the No Database Created window will replace it.
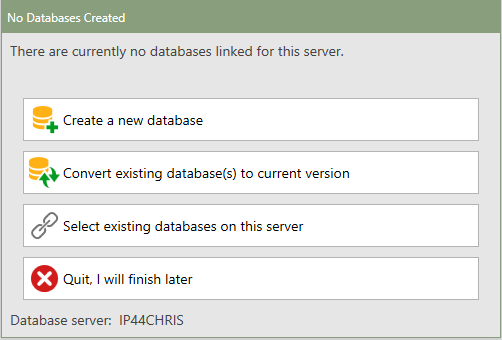
Note: At the No Database Created window, a user will have three different options depending on the situation. Click one of the three options below to continue the instructions on setting up Antero.
Follow the instructions below for new users who need to setup a new database:
1.New users will choose the first option to {Create a New Database], which will open the Create Database window.
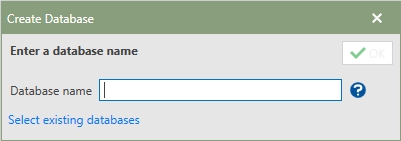
2.Type in the database name in the Database Name field and then click the [OK] button in the upper right-hand corner of the window.
Note: The database name must match the criteria to be a valid database. The name cannot start with numbers, must have no spaces, and no special characters.
3.The program will create the database and then the User Added window will open.
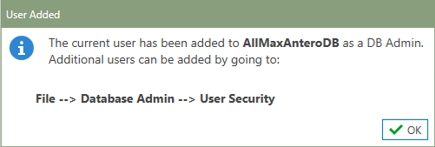
4.Click the [OK] button to close the window.
5.If necessary, users can go to User Security section to add specific security for new users.
|
For existing users running version 6.15.1314, follow the instructions to convert the database:
1.Existing Customers who already have an existing Antero 6.15.1314 database to convert should click Convert Existing Database(s) to current version.
2.A window informing the user that the Antero application will be closed in order to launch the Conversion Utility will appear. Click the green [YES] to proceed or the red [NO] to cancel.
3.The Antero Database Upgrade window will open. Start by clicking the ellipses button (...) at the end of the Database Server field.
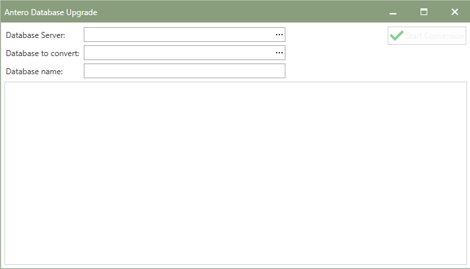
4.The ‘Select the Database Server’ window will open in front of the ‘Antero Database Upgrade’ window. Choose the correct server where the Antero Database is hosted.
5.Next, at the end of the Database to Convert field, click the ellipses button (...) to choose the Antero 6.015.1314 database which needs to be converted.
6.Then, type the name of the unique converted adtabase name in the Database Name field.
7.Lastly, click the  button in the upper right-hand corner of the window. button in the upper right-hand corner of the window.
8.After the database has been successfully updated to version 7, double-click on the application shortcut to open Antero 7.
9.The Select Antero Database window will be visible after the program is opened.
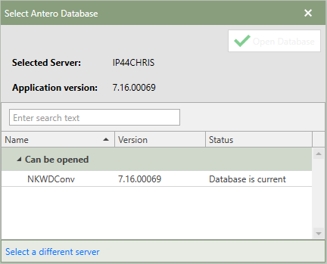
10.Select the database under Can be Opened heading and then click the Open Database button in the upper right-corner.
Note: Unable to Open means the database is either an older database version or the user does not have the access to access it.
|
This option is for if the database has already been converted to the latest version or it is a restored backup in SQL and needs to be connected to Antero.
1.Click the Select Existing Database on the Server option and a Select Databases window will appear. (This window will display all of the Antero Databases that are on the server.
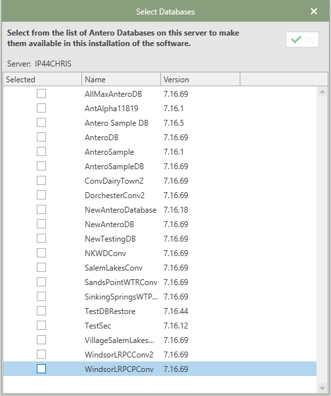
2.Check any or all of the databases that need to be added in Antero.
3.Click the [OK] button in the upper right-hand corner of the window.
4.The Select Antero Database window will open in front of the application with the databases now available.
5.Select the database which needs to be opened and click the Open database button.
|
